
How to Photograph for 3D Lenticular Printing
Understanding 3D Lenticular
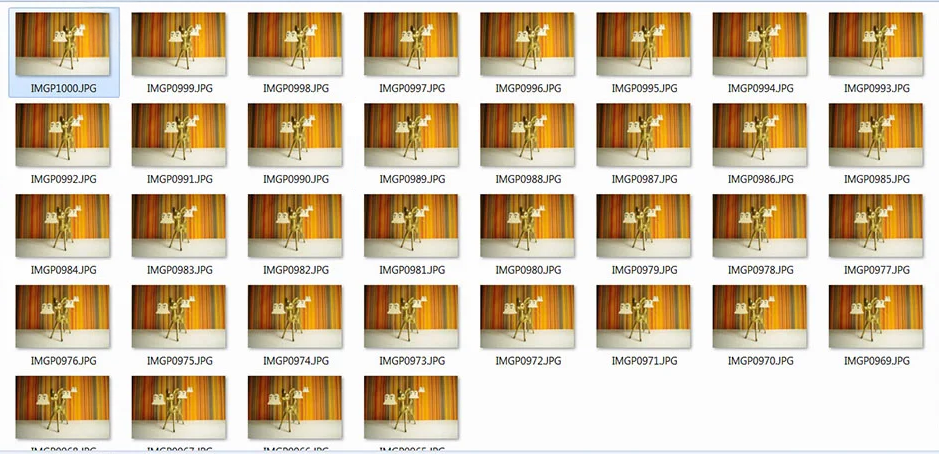
3D lenticular printing creates striking illusions of depth on flat surfaces by presenting slightly different images to each eye, mimicking natural stereoscopic vision. The process requires a parallax sequence - a series of images captured from incrementally different horizontal positions. If played sequentially these images (like those to the left) produce an animation but when processed as a lenticular actually create the same sense of dimension you would experience in a 3D movie - but without the need for glasses. This guide is based around using a traditional camera system but the same principles apply to rendering image sequences from 3D software as well.
Essential Equipment and Setup
Camera Rail System
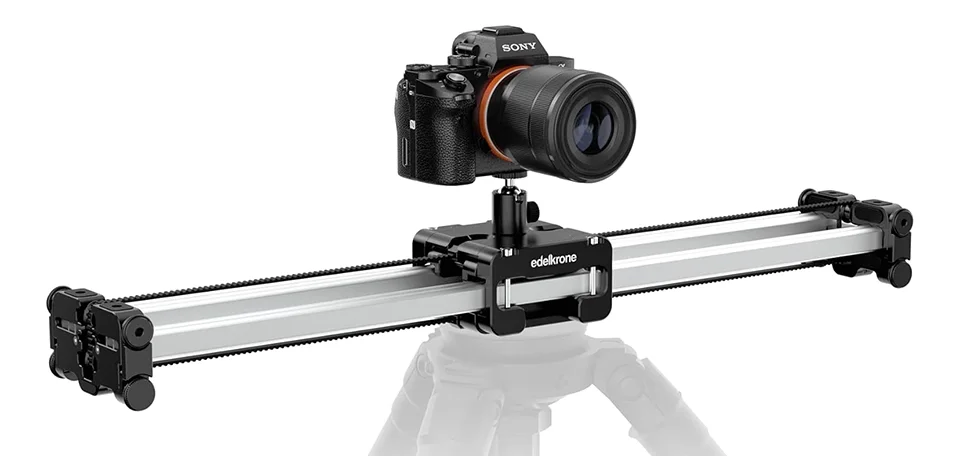
A camera rail system forms the foundation of quality 3D lenticular photography. Commercial sliders are readily available, though DIY solutions work equally well. Motorized options are plentiful and offer features like speed control and move/pause routines that allow for longer shutter speeds without blurring. For most studio situations, a 36-inch rail provides sufficient stereobase for subjects ranging from tabletop scenes to portrait work.
Camera Settings
Manual control is essential for consistency across your image sequence. Lock your exposure settings after metering the scene, disable auto-focus after establishing your focal point, and turn off any automatic white balance adjustments. These precautions ensure uniform appearance across all frames, preventing distracting variations in the final lenticular print.
Capturing the Parallax Sequence
Determining Stereobase
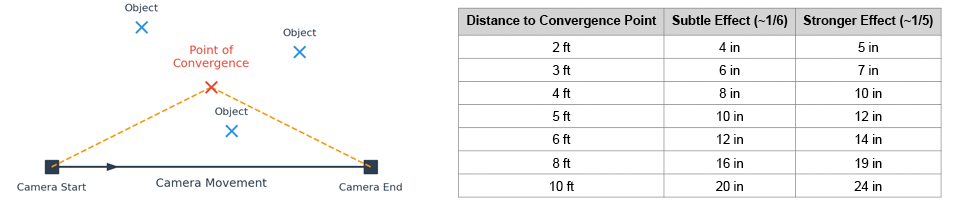
The stereobase, the total distance your camera travels, determines the depth effect in your final print. You start by making a decision on what your point of convergence will be, the thing that you want to be clearest, that will neither come out toward the viewer or recede. Position the camera at a comfortable distance from that point, such as 4–8 feet for people or 1–3 feet for smaller objects, and make sure the nearest object in the scene is about half that distance while the background is roughly two to three times farther. As a starting rule, move the camera about one-sixth to one-fifth of the distance to the convergence point for the total shot sequence, using the smaller fraction for a subtle effect and the larger for a stronger one, then take evenly spaced shots across that travel while keeping the camera level. In reality it is better to shoot with a wider stereobase and take more photos than needed to give yourself options down the road.
Camera Movement Strategy
Position your camera at the leftmost point of your intended stereobase. Move the camera along the rail avoiding any rotation unless specifically using the arc method. Moving from left to right creates a sequence matching the order most commonly expected by lenticular printing services.
Number of Images
While twelve frames can yield a workable parallax sequence, capturing 100 images or more provides greater flexibility. More frames create smoother background transitions and allow you to select the optimal subset for different print sizes. For example if you make a large print with a 100 image sequence you have taken you might choose to use 60 frames so as not to have too much parallax, where if the image is later printed smaller you might use all of them.
Shooting Methods: Parallel vs. Convergent
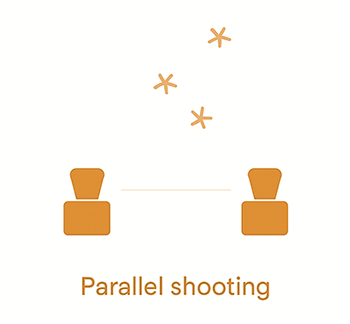
Parallel Shooting
Keep your camera facing the same direction throughout the sequence, sliding it laterally without rotation. This method minimizes distortion and simplifies capture but requires significant cropping during post-processing alignment. The resulting images typically yield portrait or square orientations after removing misaligned edges.
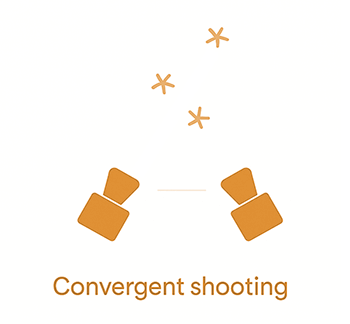
Convergent Shooting (Arc Method)
Rotate the camera at each position to keep a central subject in frame throughout the sequence. While this introduces some vertical parallax distortion, it preserves more of your original framing and better suits landscape-oriented compositions. Arc-shaped camera sliders automate this process, though manual adjustment works with patience.
Optimizing Your Subject and Composition
Ideal Subject Characteristics
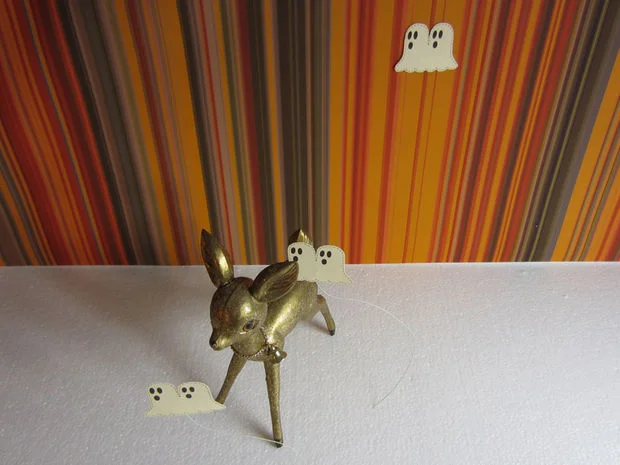
Static subjects are essential for single-camera capture. Any movement of the subject between frames will create ghosting and impact the 3D illusion. For dynamic subjects, multi-camera arrays that capture all perspectives simultaneously are required, though this significantly increases complexity and cost.
The most effective 3D lenticulars feature multiple overlapping objects at various points of depth. Forest scenes, architectural interiors with columns, or arranged objects at varying distances all provide excellent depth references. Include elements that extend toward the viewer as well as those receding into the background. Many photographers focus solely on receding depth, but incorporating foreground elements that appear to project forward doubles your depth potential and creates a more immersive three-dimensional experience.
Compositional Guidelines
Keep protruding elements away from frame edges where the 3D effect breaks down. Objects meant to project forward lose their dimensional quality when they touch or are cropped by side image borders. Interestingly the 3D effect is not overly compromised if protruding objects touch the top and bottom borders. Maintain clear space around key foreground elements, allowing them to float freely in the viewer's space.
Background Considerations
Avoid uniform colored backgrounds, particularly pure white or black, which lack the texture needed to register depth effectively. Even subtle patterns or gradients provide visual anchors that enhance the dimensional effect. In studio settings, textured backdrops or projected patterns work better than evenly lit flat surfaces.
Managing Depth of Field
Shallow depth of field enhances the 3D effect by naturally separating depth planes. When background and extreme foreground elements exhibit soft focus, you can employ greater stereobase distances without introducing disturbing parallax jumps. Focus on elements in the near-to-middle distance, allowing natural blur to handle extremes.
Technical Refinements
Setting the Convergence Point
The convergence point determines which depth plane appears to rest on the print surface, with nearer objects projecting outward and farther objects receding. You should have this point in mind during the shoot but it can be adjusted later in Photoshop. Objects at this depth will exhibit no parallax movement between frames.
Optimal convergence typically falls in the middle-ground of your scene, balancing projection and recession. However, you might adjust this for artistic effect - choosing a point of convergence that is further back creates dramatic pop-out effects, while choosing a point more forward emphasizes depth and space.
Measuring and Controlling Parallax
The technical goal of all of this work is to create an image sequence with suitable parallax. Verify your parallax by overlaying your leftmost and rightmost images at intended print size. Bring your far left and far right images into photoshop and layer them over each other, reducing the top layer opacity temporarily so you can see features of both images. Align the images to your chosen point of convergence if you haven’t done so through your shooting method. Crop the image just as you want it to appear in the final print and, importantly, set the image size to be exactly what you intend for the final print. Now you can measure your parallax. Find the closest object in your scene and compare the distance between the left view and the right view. In photoshop this can be done with the marque tool and the info panel open. Note the number and do the same thing for the background parallax. In most cases you want the forward and background parallax to be similar numbers, or perhaps slightly less for the foreground if you need it to be sharp. If they are not balanced then choose a different point of convergence and align your images until you are able to make the two numbers similar.
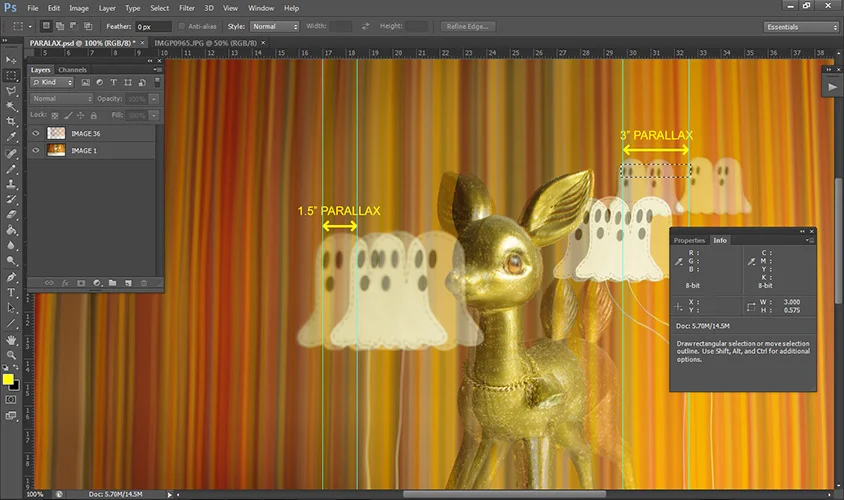
When planning large format 3D prints, target approximately 3 inches of parallax for both foreground and background elements at final print size. While this target often produces slightly excessive depth, it provides maximum flexibility during post-processing. If your parallax measurements exceed 3 inches, calculate the optimal number of frames to approach this target—though avoid using fewer than 60 frames total. Conversely, if your parallax falls significantly below 3 inches, consider reshooting the sequence with increased stereobase distance.
Once you've determined the optimal frame count, align all images to the convergence point that creates balanced depth distribution. Crop the aligned sequence to eliminate edge artifacts from the alignment process. Verify that all frames maintain identical dimensions and precise positioning throughout the sequence. Export as a numbered image sequence that matches your original left-to-right capture order.
Conclusion
Creating compelling 3D lenticular images combines technical precision with artistic vision. Success requires careful attention to camera movement, subject selection, and post-processing alignment. While the initial learning curve may seem steep, mastering these techniques opens creative possibilities unavailable in traditional photography. Start with simple subjects and gradually increase complexity as you develop intuition for parallax relationships and depth composition. With practice, you'll consistently produce lenticular sequences that capture a layer of dimension that transforms static images into mesmerizing visual experiences.